The objective of this article to understand the end to end flow of container development to deployment in target environment and list down the docker commands needed for every action.
1 Introduction
The overall process consists of i) develop a container image with your code, dependent software and configurations, ii) run and test the container in development environment, iii) publish the container image into docker hub and finally iv) deploy the docker image and run the container in the target environment. This article assumes that you have installed docker engine in the development and target environment. Please refer 6.3 for installation instructions.
2 Develop Container Image
To build the container image, we have to create a Dockerfile which will contain all the necessary information. Please refer https://nodejs.org/en/docs/guides/nodejs-docker-webapp/ to develop the Dockerfile.
2.1 Build docker container
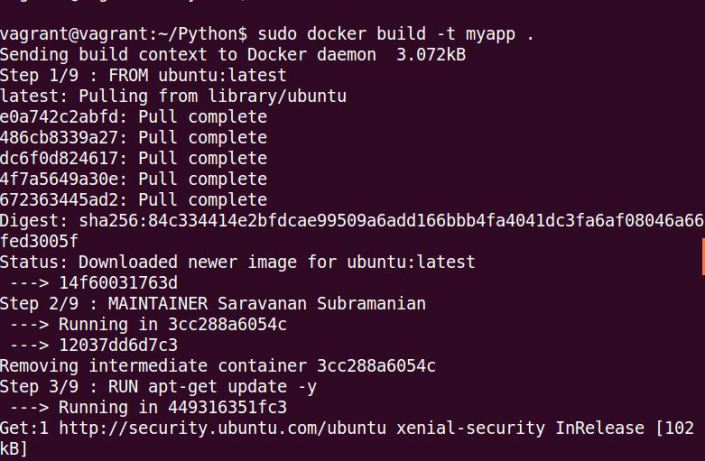
$docker build -t containername .
The command will take the Dockerfile present in your current directory. If you have the docker file in a different name and different location, we can use -f flag to specify the docker file name. The “docker build” command will build the container image in the name specified with “-t” flag.
$docker build -t myapp .
2.2 Docker Image Naming Convention
We can provide any name to a docker container, when you run locally. It could be as simple as “myApp” as shown above. But if you want to publish the image into docker hub, there is a specific naming convention to be followed. This convention helps the docker tools to publish the container image into right namespace and repository.
The format:
NameSpace/Repository:Version
So, I build the docker image using the above convention:
$docker build -t saravasu/techietweak:001 .
We can also use the “docker tag” command to create a image from an existing image. The “docker tag” command is explained below.
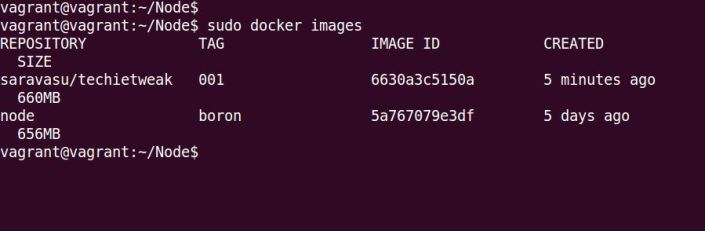
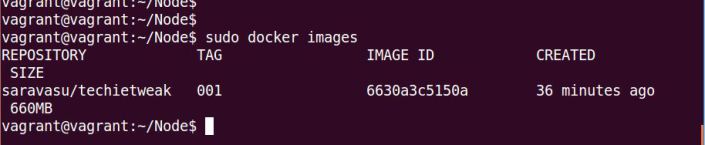
2.3 List All Images in the Docker
$docker images
3 Run the container
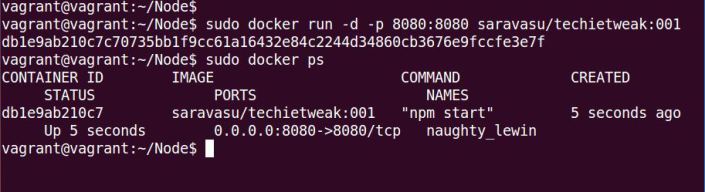
3.1 Start the Docker Container
Use the “docker run” command to start the docker container.
$docker run -d -p 8080:8080 saravasu/techietweak:001
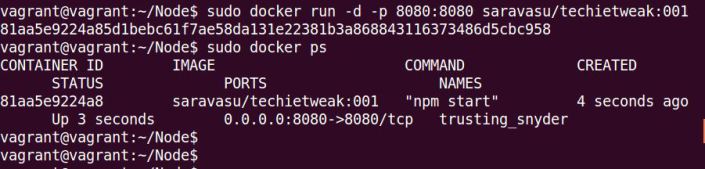
The “-d” option run the container in the detached mode, so that the container continues to run, even if the terminal is closed.
The “-p” command used to map the ports. In this example, “-p 8080:8080” the first port number is the port used the docker host. The second port number is used by the docker container. As per this command all the traffic comes to the docker host port, will be forwarded to the docker container port.
3.2 Check current running containers
$docker ps
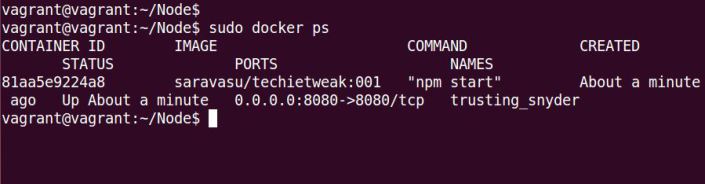
From the above output, we can see that docker container is running in the name of “trusting_snyder”
To list all the containers irrespective of the states, use the “-a” switch.
$docker ps -a
3.3 Show the console logs of the running container
$docker logs <containerName>
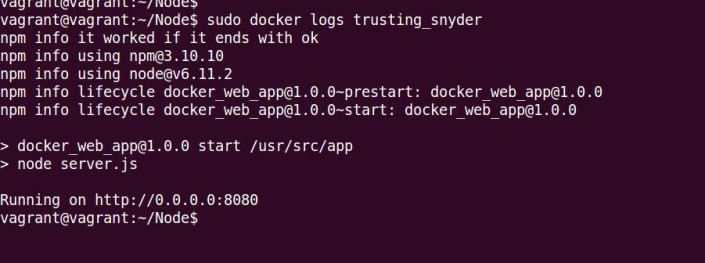
ContainerName is can be found from “docker ps” command
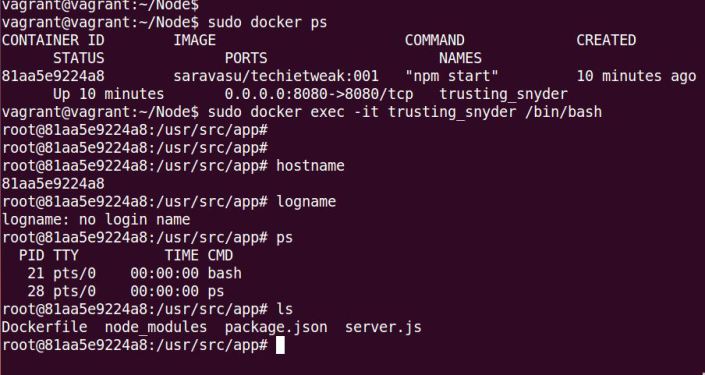
3.4 Login to the container
$docker exec -it containerId /bin/bash
The above command will prompt you with “bash” shell of the container.
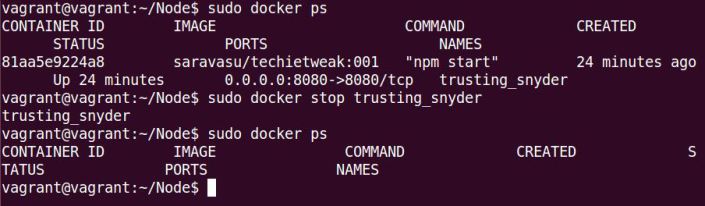
3.5 Stop the running container
$docker stop <containername>
3.6 Remove the container image from the docker
$docker rm imageId
Note. Find the imageId of the container using the command “docker images” or “docker images -a ”
$docker rmi -f <List Of Image Ids>
The above command will forcefully delete the given image.
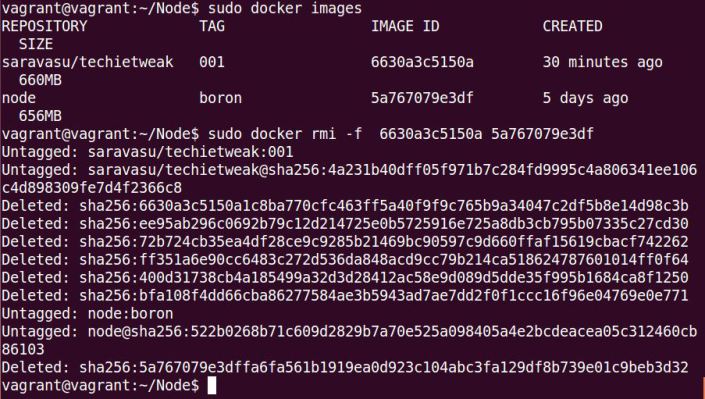
3.7 Clean up your docker / Delete All container images in the local docker
$docker rmi -f $(docker images | tr -s ' ' ' ' | cut -d' ' -f3)
4 Publish The Container Image
The docker container images can be published to your local dockyard or the public docker hub. The process and commands are same for both. To publish your docker image in the docker hub, first create your namespace and repository in the http://hub.docker.com.
I have used my namespace “saravasu” and the repository “techietweak” for this exercise.

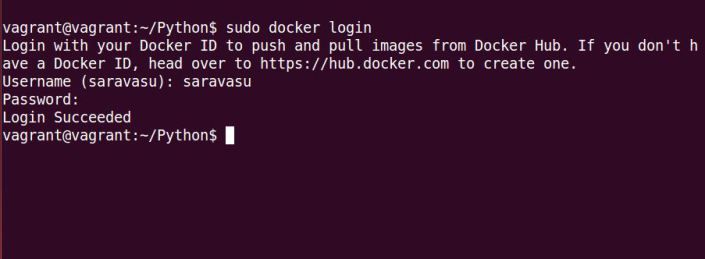
4.1 Login To Docker Hub
$docker login
If you want to login to you local repository, please provide the URL. If URL is not specified, then this command will login to docker hub.
$docker login http://localhost:8080
4.2 Tag The Container Image
To push the docker container image into docker hub, it must be tagged in a specific format.
It is <Namespace>/<Repository>:<Version> . If you don’t specify the version, it will be taken as “default”. In the below command, I am tagging the image “myapp” , as “saravasu/techietweak:001”, where as “saravasu” is my namespace (login id), techietweak is repository and 001 is the version.
$docker tag myapp:latest saravasu/techietweak:001
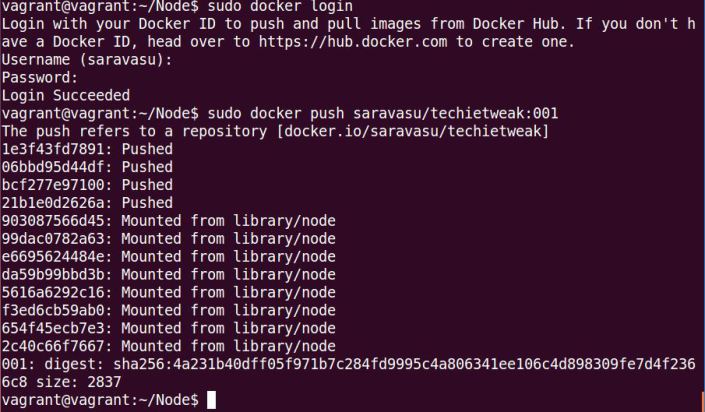
4.3 Push the docker image into docker hub
$docker push saravasu/techietweak:001
4.4 Check the Container Images in Docker Hub
Now login to you docker hub account and check for the images in the respective repository.

5 Deploy The Container
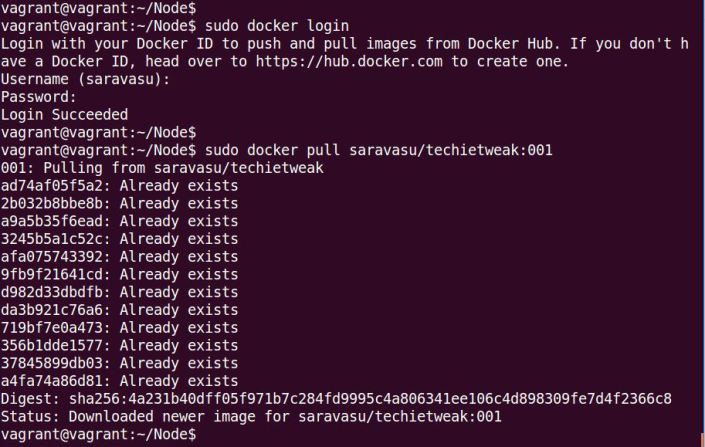
5.1 Pull The Docker Container Image
Login into docker hub from the host machine in the target environment and pull the container image from docker hub. If you want pull it from your private dockyard use the command “$docker login <hostname>” to specify the hostname the private dockyard.
$docker login
The above command will login to https://hub.docker.com, since the host name is not specified.
$docker pull saravasu/techietweak:001
5.2 Check the image
The docker pull command downloaded the container image from the docker hub. We can validate the same by using “docker images” command.
$docker images
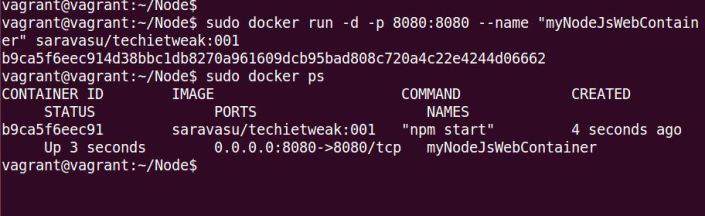
5.3 Run the container
Now we can run the Docker Container, in the same way we ran in the development environment and test in the same way we have done it before.
$docker run -d -p 8080:8080 saravasu/techietweak:001
The docker run command starts the container. To validate the same, we can use “docker ps” command. The docker has created a new container and it is running in the name of “naughty_lewin”.
As we see above, the docker engine provides a random name to the running container. But this could be a problem in automation, so it is always good to specify a name we want to refer. This can be achieved by using “–name” parameter.
$docker run -d -p 8080:8080 --name "myNodeJsWebContainer" saravasu/techietweak:001
6 Summary
This article captures over all flow and necessary commands to develop the container image, run it in local environment, publish the image to docker hub and run the container in the target environment. For further study and detailed documentation is available in docker website [Ref 6.1].
7 References
- 7.1 Dockerfile Reference https://docs.docker.com/engine/reference/builder/
- 7.2 Dockerize Node.js Web App https://nodejs.org/en/docs/guides/nodejs-docker-webapp/
- 7.3 Docker Installation : https://docs.docker.com/engine/installation/
| Reference: | Docker Commands for Development to Deployment from our WCG partner Saravanan Subramanian at the Saravanan Subramanian Tech Notes blog. |