jQuery Tooltip Example
EDITORIAL NOTE: In this post, we feature a comprehensive jQuery Tooltip Example.
Tooltips are a very useful element in web development, as it makes it easy to present information and explanations to the user without cluttering the page. Essentially, a tooltip is a “hover box” that appears when we hover the mouse cursor over a specific element. That way, the information will be presented in real-time, only when the user actually needs to see it, maintaining the simplicity of the page.
JQuery UI provides its own tooltip implementation, which can be used very easily with only a few lines of code. In this example we are going to show how to use it, and the script files needed to achieve this, which are:
- JQuery 2.1.1
- JQuery UI
1. JQuery Tooltip: How to use.
Let’s say that we have a simple web page and we need to provide additional information in various places, so we need to apply the tooltip to the whole document. This can be easily achieved using the following code:
// Enable tooltip for the whole document.
$(document).tooltip();
Using standard JQuery selectors (like the above) we can apply the tooltip() method to other classes, ids etc. Afterwards, it is really easy to apply a specific tooltip to an element, just by using the title attribute inside the tag, like this:
<div title="Information about what happens here...">Welcome to this page!</div>
Of course, there are also other attributes that you can use in order to customize your JQuery tooltip. which can be passed as arguments to the tooltip() method. The most important of them are:
show: It determines how the tooltip will appear on screen, using the effect and the delay attributes, e.g:show: { effect: "slideDown", delay: 100 }hide: Similar to show, it determines how the tooltip will disappear, when the mouse does not hover over the page element anymore, e.g:hide: { effect: "fade", delay: 200 }track: It tracks the mouse movement, in order to make the tooltip to follow the mouse (as long as it remains within the limits of the element). The only applicable parameters here aretrueandfalse.position: It determines the position on which the tooltip will appear. The valid options are the the combinations of top, center, bottom and left, right.open: This attribute needs a whole function, which will run every time a tooltip is being initialized.
2. JQuery Tooltip Example.
Let’s show a complete example of how we could use JQuery tooltip during the development of a page or a web application! No matter the tag name, the process is the same, and you will always need to apply the title attribute for each one of the tags that need to have a tooltip.
Of course, as always with web pages and web applications, we have to import the appropriate JavaScript and CSS files that are going to be used. In our case, since this is an example about the UI capabilities of JQuery, we are going to need JQuery, JQuery UI (the .js files), as well as the JQuery UI theme .css file, which is the “visual” part of JQuery UI. The process is the same every time:
- For the .js files:
<script src="path/to/js/file"></script>
- For the .css files:
<link rel="stylesheet" href="path/to/css/file">
tooltipExample.html
<!DOCTYPE html>
<html>
<head>
	<title>Tooltip Example</title>
	<script src="jquery-2.1.1.min.js"></script>
	<script src="jquery-ui.min.js"></script>
	<link rel="stylesheet" href="jquery-ui.theme.min.css">

	<script>
	   // Enable tooltip for the whole document.
	   $(document).tooltip({
		   show: {
			   effect: "slideDown",
               delay: 100
		   },
		   hide: {
		        effect: "fade",
		        delay: 200
		   },
		   position: {
			   at: "center right"
		   },
		   track: true,

		   open: function (event, ui) {
			   // We can apply specific CSS properties to the tooltip,
			   // by using just JS.
               ui.tooltip.css("max-width", "300px");
               ui.tooltip.css("border", "2px solid black");
          }
	   });
	</script>
</head>
<body>
    <h2 title="This is the tooltip for the title!">This is a Tooltip Example!</h2>
</body>
</html>
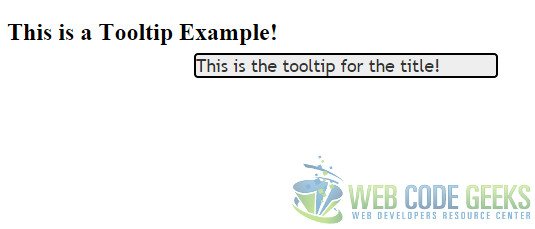
The result from the above code will be a hover box which will show everything that we gave as an input to the title tag. Take a look at this screenshot:

3. Download the Example
This was an example of JQuery tooltip.
You can download the full source code of this example here: JQueryTooltip


Not at all helpfull. Thanks for trying.