Laravel and Behat Using Selenium and Headless Chrome
Let’s take a look at using Codeship for Selenium and Headless Chrome testing, which is key for interacting with JavaScript features on your site. I also want to show you how to troubleshoot those rare moments when there’s an issue on the CI but not on your local build, by using Codeship’s SSH feature and Sauce Lab’s remote connections. You can see all the code here.
Setting Up Your Local Environment
First, we need to set up Codeship to test our app with every git push. You can see this demonstrated previously on the blog, thanks to Matthew Setter’s post about Laravel and Codeship. Following that, you should have things working and PHPUnit running. Now let’s add Behat to this.
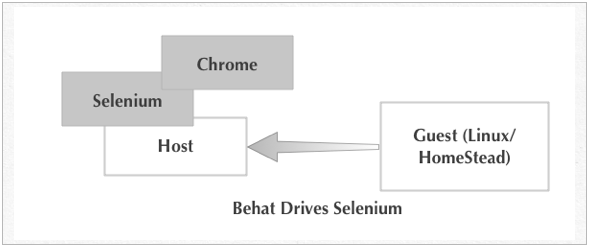
In this post, we’ll have a Host (Mac) and a Guest (Linux), thanks to Homestead. At the end of the article, I’ll list some links for Windows as well.
Here’s a look at the Host-Guest workflow.
The first part of this setup is based on a Laravel Behat-oriented library started by Laracast’s creator Jeffrey Way. After you follow the install steps there, you will have a working version of Behat that integrates with your Laravel application in some nice ways, including migrations and transactions hooks.
But even after that, I need to take it one step further. I need to get Selenium set up both as a server and a Mink Extension. This will get you going for the Mink and Selenium driver:
composer require "behat/mink-selenium2-driver":"^1.3"
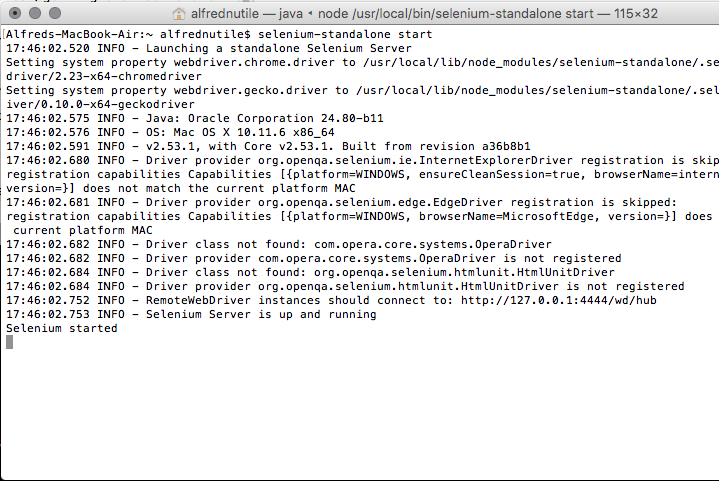
For the Selenium server, this will be a bit harder but not by much. Remember this is on your Host; the above was on your Guest. Basically, this tutorial will walk you through an easy install of Selenium on any Host OS. For me and my Mac, I use brew to set up Node.js. From there, I follow those three steps to get going. When I’m done, I have a terminal in the background just running Selenium.
Your First Behat Test
At this point, I need to make a behat.yml in the root of my application and fill it with the following:
default:
  suites:
    user_auth:
      contexts: [ UserAuthenticationContext ]
      filters: { tags: '@user_auth' }

  extensions:
    Laracasts\Behat:
        # env_path: .env.behat
    Behat\MinkExtension:
        base_url: https://codeship-behat.dev
        default_session: laravel
        laravel: ~
        selenium2:
          wd_host: "http://192.168.10.1:4444/wd/hub"
        browser_name: chrome
We’ll build off this in a moment to add Codeship. But for now, I have one suite to get started (user_auth) and one profile (default). I have the base_url for the local site (https://codeship-behat.dev), and for now it’s using my application’s .env file as seen on this line in the # env_path: .env.behat. This will change for the Codeship profile.
Notice too that I used the IP of my Host to talk to Selenium from inside my Guest — http://192.168.10.1:4444/wd/hub; one more thing that will change for the Codeship profile.
Initialize Behat and Write a Test
So now to prove all of this is working, I start by running:
vendor/bin/behat --init
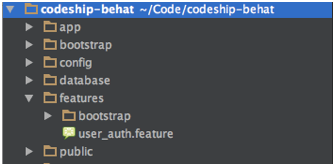
You now have a features folder in the root of your application and inside of that, a bootstrap folder, and finally, inside of that, a FeatureContext.php file.
Now to make my feature file features/user_auth.feature:
And I need to fill in the details:
Feature: User Login Area
  User can log into the site
  As an anonymous user
  So that they can see secured parts of the site

  @happy_path @user_auth @javascript
  Scenario: Logging in with Success
    Given I visit the login page
    And I fill in the form with my username and password and submit the form
    Then I should see "You are logged in!"
Focusing on the @happy_path for now, we tag it @user_auth so we know it is part of the suite as seen in the behat.yml file above filters: { tags: '@user_auth' }. I could have used folders to organize my suites but chose tags for now.
Now if I run:
vendor/bin/behat --suite user_auth --init
I get a file (features/bootstrap/UserAuthenticationContext.php) that’s pretty empty and needs to be told to extend MinkContext. So I just need to change the “extends” section so it looks like this:
<?php

use Behat\Behat\Hook\Scope\AfterStepScope;
use Behat\Behat\Tester\Exception\PendingException;
use Behat\Behat\Context\Context;
use Behat\Behat\Context\SnippetAcceptingContext;
use Behat\Gherkin\Node\PyStringNode;
use Behat\Gherkin\Node\TableNode;
use Behat\Mink\Driver\Selenium2Driver;
use Behat\MinkExtension\Context\MinkContext;

/**
 * Defines application features from the specific context.
 */
class UserAuthenticationContext extends MinkContext implements Context, SnippetAcceptingContext
{
    public function __construct()
    {


    }
Now we want to take our feature, which has some custom steps in there, and have Behat stub these out in the features/bootstrap/UserAuthenticationContext.php.
vendor/bin/behat --suite user_auth --append-snippets
That file will now be full of stubbed-out functions that have the annotations to connect to your feature’s steps that throw a PendingException to let you know there’s more work to do.
Keep in mind that Then I should see "You are logged in!" in this example is a Mink-related step, so there’s nothing else I need to do. However, And I fill in the form with my username and password and submit the form is custom, so I need to fill in some code there.
/**
     * @Given I fill in the form with my username and password and submit the form
     */
    public function iFillInTheFormWithMyUsernameAndPasswordAndSubmitTheForm()
    {
        $this->fillField('email', 'foo@foo.com');
        $this->fillField('password', env('EXAMPLE_USER_PASSWORD'));
        $this->pressButton('Login');
    }
Now our test is ready to run. I’m talking to the DOM in the above steps, so if I remove the @javascript from that test and run:
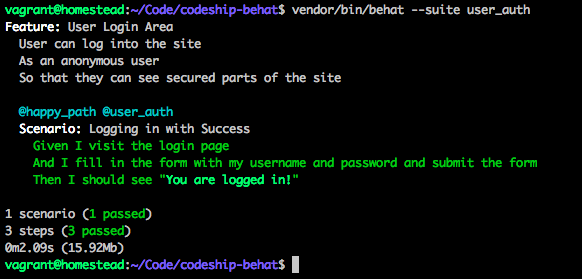
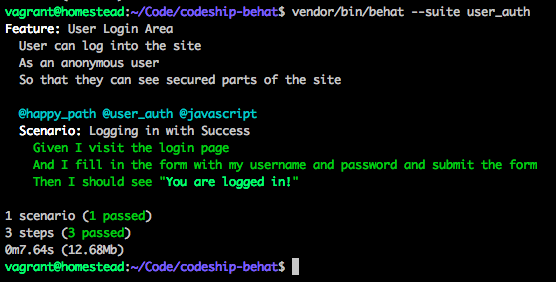
vendor/bin/behat --suite user_auth
We aren’t talking to Selenium but to BrowerKit. Note how fast it is!
And add the tag back and run again:
Be careful to only use @javascript when really needed.
As you can see, it’s 0m7.64s with @javascript and 0m2.09s without! So be careful to only use @javascript when really needed (e.g., when the page you’re testing has JavaScript that you are focusing on). So my Behat test can have two scenarios: one has @javascritp and one does not. Or the entire feature can be marked @javascript if needed.
@javascript
Feature: User Login Area
  User can log into the site
  As an anonymous user
  So that they can see secured parts of the site
Four Steps to Set Up Codeship for Headless Chrome
Now that the test is passing locally, let’s get to Codeship.
Step 1: Add a profile to behat.yml
For Codeship, that looks like this:
codeship_non_sauce:
    extensions:
        Laracasts\Behat:
            env_path: .env.codeship
        Behat\MinkExtension:
            base_url: http://127.0.0.1:8080
            default_session: laravel
            laravel: ~
            selenium2:
              wd_host: 'http://127.0.0.1:4444/wd/hub'
            browser_name: chrome
This leaves our behat.yml looking like this:
default:
  suites:
    user_auth:
      contexts: [ UserAuthenticationContext ]
      filters: { tags: '@user_auth' }

  extensions:
    Laracasts\Behat:
        # env_path: .env.behat
    Behat\MinkExtension:
        base_url: https://codeship-behat.dev
        default_session: laravel
        laravel: ~
        selenium2:
          wd_host: "http://192.168.10.1:4444/wd/hub"
        browser_name: chrome


codeship_non_sauce:
    extensions:
        Laracasts\Behat:
            env_path: .env.codeship
        Behat\MinkExtension:
            base_url: http://127.0.0.1:8080
            default_session: laravel
            laravel: ~
            selenium2:
              wd_host: 'http://127.0.0.1:4444/wd/hub'
            browser_name: chrome
What we are doing is setting up a .env.codeship just for Codeship settings, as well as setting a new base_url and using Selenium on 127.0.0.1.
Step 2: The .env.codeship file
Make that file in the root of your application and add to it this:
APP_ENV=codeship
APP_KEY=base64:w0k4ZmTt89FApLdUaAsubNXH1eQcHR8vyat/ZvmqRso=
APP_DEBUG=true
APP_LOG_LEVEL=debug
APP_URL=http://127.0.0.1:8080

DB_HOST=localhost
DB_DATABASE=test
DB_PASSWORD=test
DB_CONNECTION=mysql
DB_USERNAME=root

QUEUE_DRIVER=sync

MAIL_DRIVER=log

EXAMPLE_USER_PASSWORD=quahf1Kaib2Ienei
At this point, we set up our environment for the needed database and APP_URL, as well as making sure QUEUE is in sync mode and MAIL_DRIVER is just log.
Step 3: Update our config/database.php
Modify the config/database.php to look like this:
'mysql' => [
            'driver'    => 'mysql',
            'host'      => env('DB_HOST', 'localhost'),
            'database'  => env('DB_DATABASE', 'forge'),
            'username'  => env('DB_USERNAME', 'forge'),
            'password'  => env('DB_PASSWORD', ''),
            'charset'   => 'utf8',
            'collation' => 'utf8_unicode_ci',
            'prefix'    => '',
            'strict'    => false,
        ],
Replacing the default mysql settings with the above will help us swap out the settings as needed for Codeship and its database work.
Step 4: Scripting the setup of Selenium and a local Laravel server
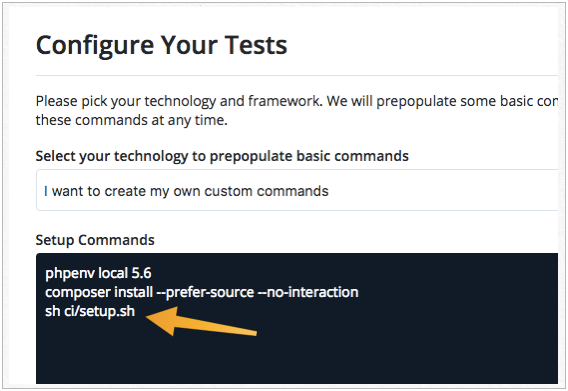
Now we need a script to set up Codeship for testing. When setting up a Codeship project, you’ll have a Setup Commands window as seen below. In here, I added ci/setup.sh.
This is placed into a script so that if I have to SSH into Codeship to recreate the environment to see what a test is failing, I can just do the one command.
Next, I make the folder ci and then in there, setup.sh. This will look like:
#!/bin/sh

###
# This is thanks to Codeship Docs
# But I wanted a newer version of Selenium
###

SELENIUM_VERSION=${SELENIUM_VERSION:="2.53.1"}
SELENIUM_PORT=${SELENIUM_PORT:="4444"}
SELENIUM_OPTIONS=${SELENIUM_OPTIONS:=""}
SELENIUM_WAIT_TIME=${SELENIUM_WAIT_TIME:="10"}

set -e

MINOR_VERSION=${SELENIUM_VERSION%.*}
CACHED_DOWNLOAD="${HOME}/cache/selenium-server-standalone-${SELENIUM_VERSION}.jar"

wget --continue --output-document "${CACHED_DOWNLOAD}" "http://selenium-release.storage.googleapis.com/${MINOR_VERSION}/selenium-server-standalone-${SELENIUM_VERSION}.jar"
java -jar "${CACHED_DOWNLOAD}" -port "${SELENIUM_PORT}" ${SELENIUM_OPTIONS} -log /tmp/sel.log 2>&1 &
sleep "${SELENIUM_WAIT_TIME}"
echo "Selenium ${SELENIUM_VERSION} is now ready to connect on port ${SELENIUM_PORT}..."


## Now we are ready to talk to Selenium let's start the Application server

cp .env.codeship .env
php artisan serve --port=8080 -n -q &
sleep 3
Basically I download Selenium standalone, then run it. After that, I copy over the .env.codeship file to .env. This ensures that the server will run with that one so it will line up with the behat.yml I’m using. If I didn’t do this, there would be no .env since this is not part of Git, and I need to make sure the env settings are correct for Codeship.
Keep in mind I could have placed all of this into the Codeship environment UI settings. However, as I mentioned before, I find this comes in handy when I want to SSH in and set up Codeship to help troubleshoot an issue.
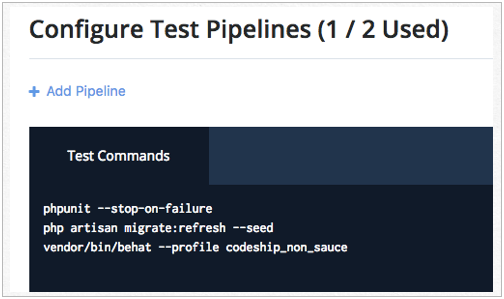
Now to make sure the Codeship test pipeline is set.
Here I do a migration and seed. Typically I would leave the seed out and let each Behat feature set up the state of the application the way it needs it. In this case, I’ll keep it simple. Note that I’m running Behat with the Codeship profile codeship_non_sauce.
During the setup in Codeship, we need to put this .env.codeship file in place. That happens in the ci/setup.sh script:
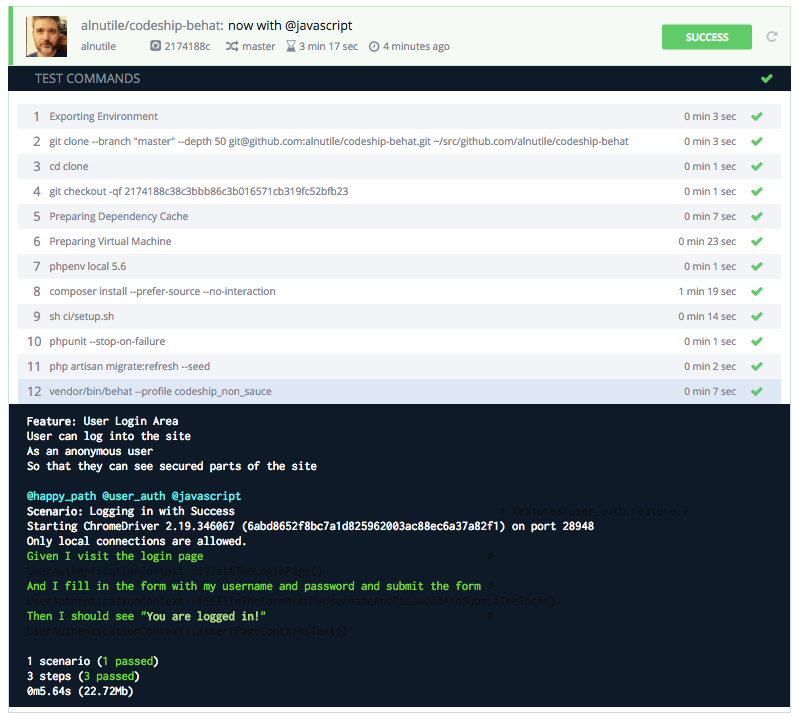
Now we push to GitHub and…
What happens when the tests don’t pass on Codeship?
Let me give you a real example of a difficult problem I wrestled with. I had this setting in my blade file:
<script src="{{ asset("/js/app.js", true) }}"></script>So locally at https://codeship-behat.dev, this worked great. But on Codeship, which runs at http://localhost:8080 (i.e., not using https), I kept getting a fail. At that point, I could put Saucelabs into the mix to watch the test run, but this was still not enough. That’s when SauceConnect comes into play, and I can interact with the Codeship server!
It was only here that I could open the Chrome console and really see the error message about not being able to connect to https://localhost:8080.
We’ll continue this in my next article, so stay tuned for it here on Codeship in a couple weeks. For now, let me leave you with a few links to tide you over.
Resources
Codeship Selenium Install Script
| Reference: | Laravel and Behat Using Selenium and Headless Chrome from our WCG partner Florian Motlik at the Codeship Blog blog. |

