jQuery UI Autocomplete Example
In this example, we’re going through a very useful widget of jQuery, autocomplete().
Autocomplete enables users to quickly find and select from a pre-populated list of values as they type, leveraging searching and filtering. Any field that can receive input can be converted into an Autocomplete, namely, <input> elements, <textarea> elements, and elements with the contenteditable attribute.
By giving an Autocomplete field focus or entering something into it, the plugin starts searching for entries that match and displays a list of values to choose from. By entering more characters, the user can filter down the list to better matches.
This can be used to choose previously selected values, such as entering tags for articles or entering email addresses from an address book. Autocomplete can also be used to populate associated information, such as entering a city name and getting the zip code.
1. Document Setup
In order to have a good start, after creating a new HTML document, add the following basic syntax and jQuery links into it:
<!DOCTYPE html>
<html lang="en">
<head>
    <meta charset="utf-8">
    <title>jQuery UI Autocomplete Example</title>

<!-- LINKS SECTION  -->
  <link href="http://ajax.googleapis.com/ajax/libs/jqueryui/1.8/themes/base/jquery-ui.css" rel="stylesheet" type="text/css"/>
  <script src="http://ajax.googleapis.com/ajax/libs/jquery/1.11.3/jquery.min.js"></script>
  <script src="http://ajax.googleapis.com/ajax/libs/jqueryui/1.8/jquery-ui.min.js"></script>
  <link href="style.css" rel="stylesheet" type="text/css"/>

<!-- JAVASCRIPT SECTION  -->

</head>
<body>
<!-- HTML SECTION  -->

</body>
</html>
Now that we’ve included the most important links like the jquery-ui and jquery javascript files, we’re ready to create a basic autocomplete field.
2. Basic Autocomplete Input Field
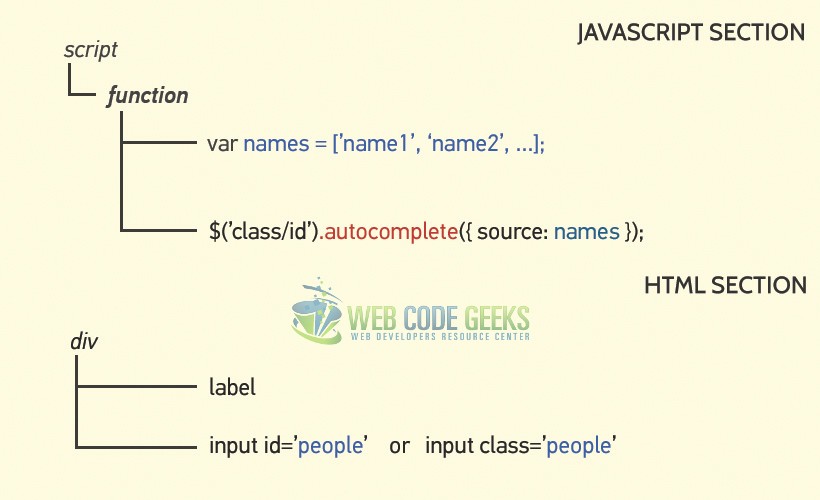
So basically, what we’re doing here is creating a variable inside a function, which will hold the actual suggested (autocomplete) words, and then use that source to populate the filtered list as we type in the input field. The schema below shows how we’re structuring our code to do this:
That’s it. Let’s go ahead and do it:
<!-- HTML SECTION  -->

<div class="ui-widget">    <!-- this class could be anything you want -->

  <label for="people">Tags: </label>

  <input class="people">

</div>
<!-- JAVASCRIPT SECTION  -->

<script>

  $(function() {

    var names = [

      "Alban",
      "Andy",
      "Ajax",
      "Bob",
      "Cody",
      "Chloe",
      "Camela",
      "Charlotte",
      "Ciara",
      "Ella",
      "Fabio",
      "George",
      "Helen",
      "Juliet",
      "James",
      "Lory",
      "Patricia",
      "Peter",
      "Roxanna",
      "Randi",
      "Selena",
      "Sara"
    ];

    $(".people").autocomplete({
    /*refer to the same id that input has*/
      source: names
    /*set the source name that you gave your array variable*/
    });
  });
  </script>
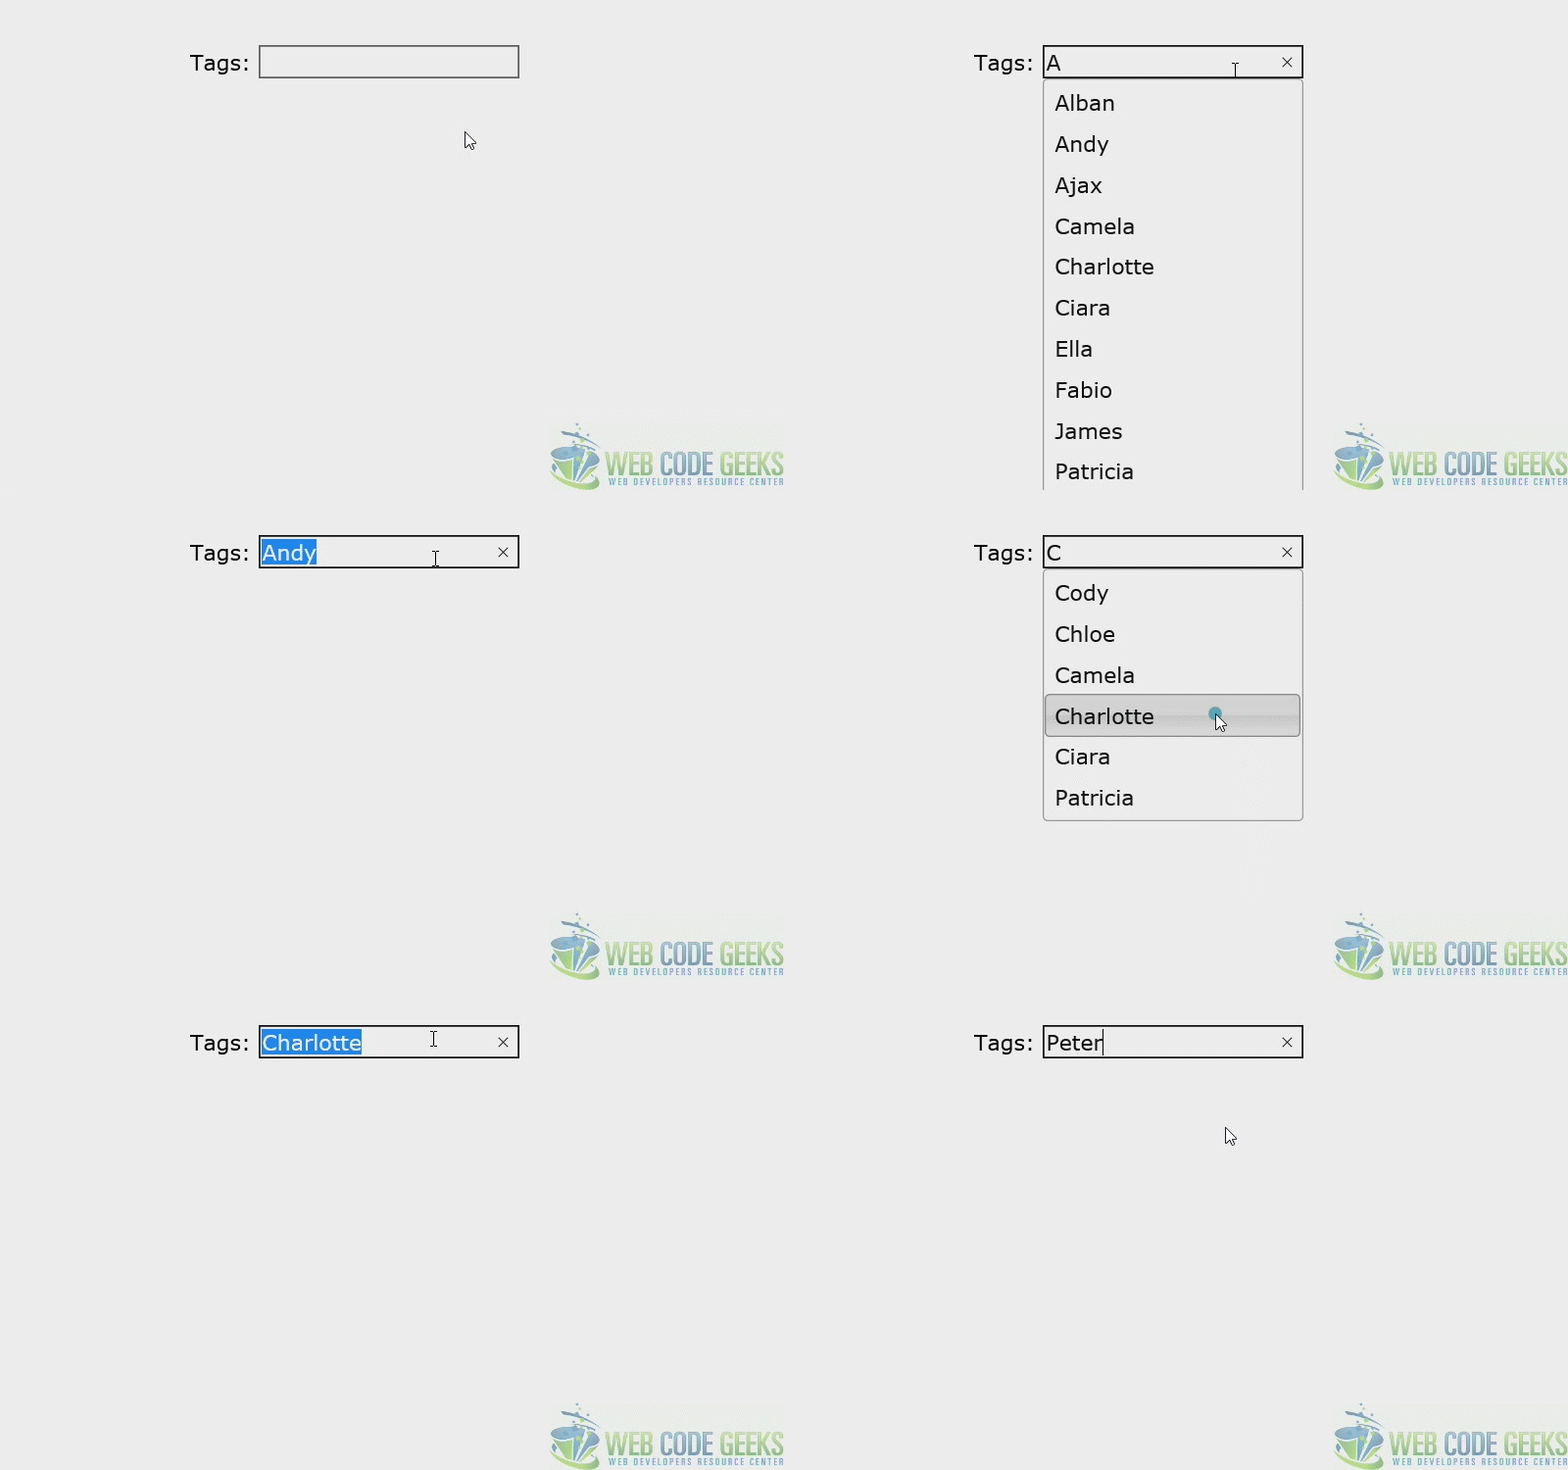
Trying this out in the browser would result in getting constant suggestions as we type:
3. Autocomplete Options
Autocomplete has some interesting options that will be helpful when using the autocomplete method. Below, we’ll have a look at some of them.
3.1 AppendTo
Add a new element in HTML, that will be the element where filtered words will be added.
<!-- HTML SECTION  -->
<div class="ui-widget">
  <label for="people">Tags: </label>
  <input class="people">
  <p class="para"></p>
  </div>
Now initialize the autocomplete with the appendTo option specified:
$(".people").autocomplete({
    appendTo: ".para"
});
Get or set the appendTo option, after initialization:
// Getter
var appendTo = $( ".people" ).autocomplete( "option", "appendTo" );

// Setter
$( ".people" ).autocomplete( "option", "appendTo", ".para" );
The result would show names getting appended to the paragraph as soon as they are searched by a letter:
3.2 Delay
The delay in milliseconds between when a keystroke occurs and when a search is performed. A zero-delay makes sense for local data (more responsive), but can produce a lot of load for remote data, while being less responsive.
Initialize the autocomplete with the delay option specified:
$( ".selector" ).autocomplete({
  delay: 500
});
Get or set the delay option, after initialization:
// Getter
var delay = $( ".selector" ).autocomplete( "option", "delay" );

// Setter
$( ".selector" ).autocomplete( "option", "delay", 500 );

3.3 Disabled
Disables the autocomplete if set to true.
Initialize the autocomplete with the disabled option specified:
$( ".selector" ).autocomplete({
  disabled: true
});
Get or set the disabled option, after initialization:
// Getter
var disabled = $( ".selector" ).autocomplete( "option", "disabled" );

// Setter
$( ".selector" ).autocomplete( "option", "disabled", true );

3.4 minLength
The minimum number of characters a user must type before a search is performed. Zero is useful for local data with just a few items, but a higher value should be used when a single character search could match a few thousand items.
Initialize the autocomplete with the minLength option specified:
$( ".selector" ).autocomplete({
  minLength: 2
});
Get or set the minLength option, after initialization:
// Getter
var minLength = $( ".selector" ).autocomplete( "option", "minLength" );

// Setter
$( ".selector" ).autocomplete( "option", "minLength", 2 );
As a result, autocompletion will only start after typing the second character in the input field:
3.5 Source
Defines the data to use, must be specified. It may be an Array, a String or a Function.
Initialize the autocomplete with the source option specified:
$( ".selector" ).autocomplete({
  source: [ "c++", "java", "php", "coldfusion", "javascript", "asp", "ruby" ]
});
Get or set the source option, after initialization:
// Getter
var source = $( ".selector" ).autocomplete( "option", "source" );

// Setter
$( ".selector" ).autocomplete( "option", "source", [ "c++", "java", "php", "coldfusion", "javascript", "asp", "ruby" ] );
Notice that we already used the source option as the most basic option, but we used an array of names apart, instead of inline declaration.
4. Conclusion
The autocomplete widget is a useful tool to consider when dealing with input fields, it gives the user a suggestion (or maybe a hint) on what the input can be filled with. As we saw here, it is highly customizable and helps you optimize it. For more information on the autocomplete widget, feel free to use the official jQuery UI wesbite and specifically this topic.
5. Download
You can download the full source code of this example here: jQuery UI Autocomplete


