Bootstrap Form Builder Example
In this example, we will create Html Forms with bootstrap framework. The bootstrap framework has a lot of classes to enable us to create forms that are responsive and provide a nice UI. We will specifically look at creating basic, horizontal and inline forms with Bootstrap and explore the various classes for styling individual form controls like inputs, buttons, anchor tags, text areas among others. So let us get started with building an example application to understand and learn the features of bootstrap for building forms.
1. Tools and Technologies
To build the example application for this example, I have used the following toolset. Some of them are required whilst others could be replaced by tools of your own choice.
Bootstrap is a front-end framework for designing responsive websites. We also include JQuery since Bootstrap needs it. The JQuery library makes writing JavaScript a breeze. Node.js in essence is JavaScript on the server-side. The Express module is used to create a barebones server to serve files and resources to the browser.
2. Project Layout
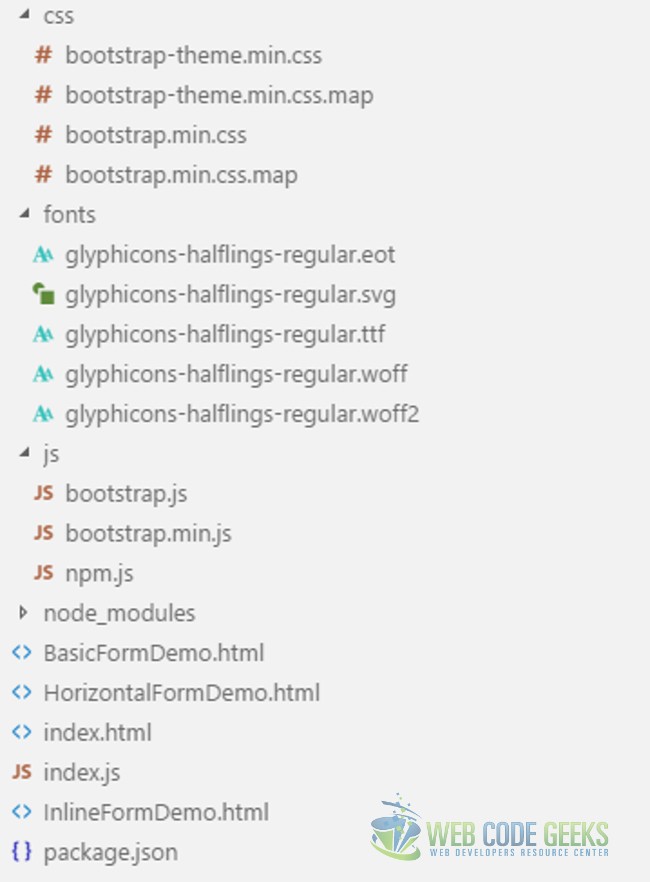
The project structure of our example application is as follows:

css
The css folder holds the Bootstrap css files taken from the Bootstrap download.
fonts
The fonts that came with the Bootstrap download are placed in this folder.
js
All Bootstrap JavaScript files and the ones we create reside in this folder.
index.js
This file is placed in the root of our project and contains code for a bare minimum web server for our use.
index.html
The index.html file contains all the HTML markup. I have used the template provided in the Getting Started section of the Bootstrap website as a start.
BasicFormDemo.html
This file hosts the demonstration of a Basic Form developed using Bootstrap Framework.
HorizontalFormDemo.html
This file hosts the demonstration of a Horizontal Form developed using Bootstrap Framework.
InlineFormDemo.html
This file hosts the demonstration of an Inline Form developed using Bootstrap Framework.
3. Forms with Bootstrap
While styling forms with Bootstrap there are some rules we need to follow regardless of the type of form we are designing. Firstly, all fields of type input, textarea and selects need to be decorated with the class .form-control. This class gives the controls a width of 100%. The next rule is to group controls and their labels in a div with the class .form-group. This class provides optimum spacing between the controls.
3.1. Basic Form with Bootstrap
This is the default mode of a form with Bootstrap and we do not need to decorate the form tag itself with a Bootstrap CSS Class. To leverage this mode we just need to follow the two rules described above for the controls that are part of the form. So, let us build a default form by writing the following Html:
BasicFormDemo.html
...
<div class="container">
    <form>
        <div class="form-group">
            <label for="txtUsername">Username or Email Address</label>
            <input class="form-control" type="text" id="txtUsername" />
        </div>
        <div class="form-group">
            <label for="txtPassword">Password</label>
            <input class="form-control" type="password" id="txtPassword" />
        </div>
        <div class="checkbox">
            <label>
                <input type="checkbox" value="" />Remember Me
            </label>
        </div>
        <div class="form-group">
            <label>Take me to</label>
            <select class="form-control">
                <option>Dashboard</option>
                <option>Admin</option>
                <option>Settings</option>
            </select>
        </div>
        <input class="btn btn-default" type="button" value="Submit"/>
    </form>
</div>
...
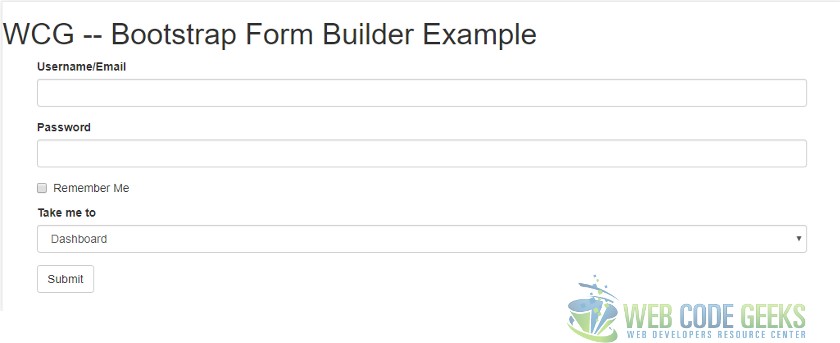
The resultant UI looks as follows:

3.2. Inline Form with Bootstrap
This mode can be enabled by decorating the Form tag with the .form-inline CSS Class. This causes all the form elements to be stacked horizontally and wrapped to next line when more space is required. Lets us look at the Html required to create an inline form with Bootstrap.
InlineFormDemo.html
...
    <form class="form-inline">
        <div class="form-group">
            <label for="txtUsername">Username/Email</label>
            <input class="form-control" type="text" id="txtUsername" />
        </div>
        <div class="form-group">
            <label for="txtPassword">Password</label>
            <input class="form-control" type="password" id="txtPassword" />
        </div>
        <div class="checkbox">
            <label>
                <input type="checkbox" value="" />Remember Me
            </label>
        </div>
        <div class="form-group">
            <label for="lstPages">Take me to</label>
            <select id="lstPages" class="form-control">
                <option>Dashboard</option>
                <option>Admin</option>
                <option>Settings</option>
            </select>
        </div>
        <input class="btn btn-default" type="button" value="Submit"/>
    </form>
...
The resultant UI looks as follows:

3.3. Horizontal Form with Bootstrap
This mode of designing a form takes a bit more effort. But the result is a form that acts as a bit like inline form on Big and medium screens and a basic form at smaller viewports. By bit like inline form, I mean to say that the labels of the controls appear to the left of the control at screen sizes exceeding 768px but on smaller screens the labels are placed above the controls like in a default form discussed above. Let us look at the Html required to create a Horizontal Form using Bootstrap:
HorizontalFormDemo.html
...
    <form class="form-horizontal">
        <div class="form-group">
            <label class="control-label col-sm-2" for="txtUsername">Username/Email</label>
            <div class="col-sm-10">
                <input class="form-control" placeholder="Username/Email" type="text" id="txtUsername" />
            </div>
        </div>
        <div class="form-group">
            <label class="control-label col-sm-2" for="txtPassword">Password</label>
            <div class="col-sm-10">
                <input class="form-control col-sm-10" placeholder="Password" type="password" id="txtPassword" />
            </div>
        </div>
        <div class="form-group">
            <div class="col-sm-offset-2 col-sm-10">
                <div class="checkbox">
                    <label>
                        <input type="checkbox" value="" />Remember Me
                    </label>
                </div>
            </div>
        </div>
        <div class="form-group">
            <label class="control-label col-sm-2">Take me to</label>
            <div class="col-sm-10">
                <select>
                    <option>Dashboard</option>
                    <option>Admin</option>
                    <option>Settings</option>
                </select>
            </div>
        </div>
        <div class="form-group">
            <div class="col-sm-offset-2 col-sm-10">
                <input class="btn btn-default" type="button" value="Submit"/>
            </div>
         </div>
     </form>
...
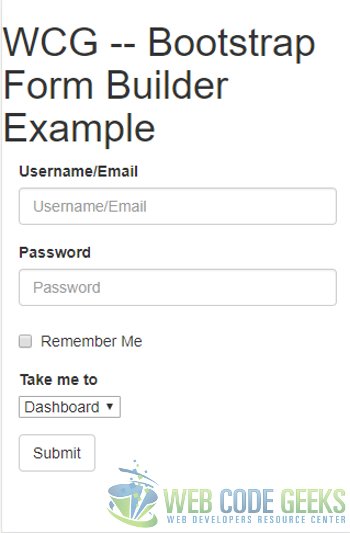
The resultant UI looks as follows on different viewports:


4. Running the Application
To run the application we need to run the following two commands at the root of the project.
> npm install
and then
> node index.js
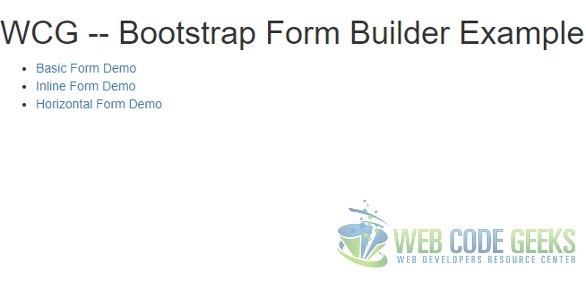
Navigate to http://localhost:8090 in a browser and you should see the below:

5. Download the Source Code
The source code for this example can be downloaded from:
You can download the full source code of this example here : WCG — Bootstrap Form Builder Example


