Bootstrap Jumbotron Example
In this tutorial, I will guide you through using the Jumbotron component from Bootstrap. A typical use of the Jumbotron is to draw the user’s attention to specific information. We will see how we can create one and the various options for styling it. We will also explore the responsive behavior of the Jumbotron on different size viewports.
1. Tools and Technologies
To build the example application for this example, I have used the following toolset. Some of them are required whilst others could be replaced by tools of your own choice.
Bootstrap is a front-end framework for designing responsive websites. We also include JQuery since Bootstrap needs it. The JQuery library makes writing JavaScript a breeze. Node.js in essence is JavaScript on the server-side. The Express module is used to create a barebones server to serve files and resources to the browser.
2. Project Layout
The project structure of our example application is as follows:

css
The css folder holds the Bootstrap css files taken from the Bootstrap download.
fonts
The fonts that came with the Bootstrap download are placed in this folder.
js
All Bootstrap JavaScript files and the ones we create reside in this folder.
index.js
This file is placed in the root of our project and contains code for a bare minimum web server for our use.
index.html
The index.html file contains all the HTML markup. I have used the template provided in the Getting Started section of the Bootstrap website as a start.
3. HTML Markup
In this section we will setup and write the HTML markup for our example in the index.html page. There are a couple of ways to use the Jumbotron component in a web page. We can occupy the entire width of the viewport by placing it outside of all containers. Or we can have the Jumbotron enveloped in a container which would offset it from the edges and give it round borders. Let us look at Html for both and the resultant output in each case.
3.1. Jumbotron outside of container
To achieve this we need the following Html markup:
index.html
...
    <div class="jumbotron">
        <div class="container">
            <h1>WCG -- Bootstrap Jumbotron Tutorial</h1>
            <p>This is a tutorial for Bootstrap Jumbotron Component from Web Code Geeks</p>
            <button class="btn btn-info">Details</button>
        </div>
    </div>
...
This should give us a layout with the Jumbotron occupying the entire width of the viewport and without rounded borders like in the below screenshot.

3.2. Jumbotron inside of container
To implement this we would modify the Html Markup in the previous section to look like below:
index.html
...
    <div class="container">
        <div class="jumbotron">
            <h1>WCG -- Bootstrap Jumbotron Tutorial</h1>
            <p>This is a tutorial for Bootstrap Jumbotron Component from Web Code Geeks</p>
            <button class="btn btn-info">Details</button>
        </div>
    </div>
...
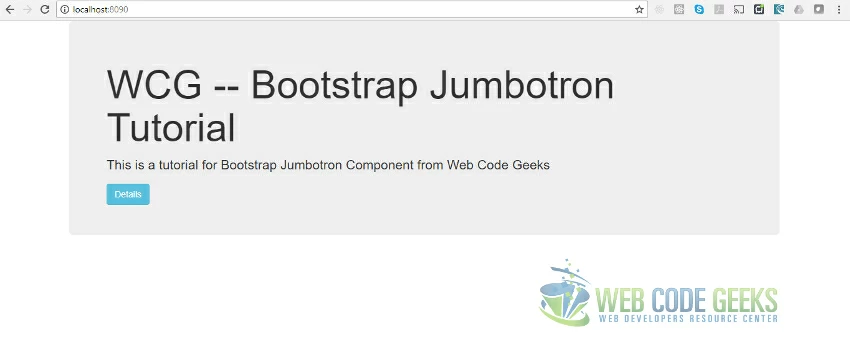
This would create a Jumbotron which is placed at the center with whitespace on either side and rounded corners. The output would be as below:

4. Running the Code
To run the code and see it in action you need to run the following commands at the root of the project:
> npm install
then
> node index.js
After running the above two commands we need to navigate to the Url http://localhost:8090 to arrive at the below page:

5. Download the Source Code
You can download the source code for this example below:
You can download the full source code of this example here : WCG — Bootstrap Jumbotron Tutorial


Nicely done! The download works great and it was just what I was looking for.
Thanks for putting this up.
Need to get rid of the captcha code though.
Is there a continuation to this section?
Thanks! Happy to be of Help. This article is a one off on Jumbotron though there plenty more posts on Bootstrap at https://www.webcodegeeks.com/category/css/bootstrap/ which might be of interest.