AngularJS Tutorial: Developing AngularJS Applications using VS Code
How to develop AngularJS applications on your local computer
In the previous installment of this series, we talked about how to create a “Hello, World” AngularJS application using Plunker, which is itself written using Angular. While using Plunker may be good for quick prototyping and showing your achievements to others, you’ll be more productive by developing your code on your local computer.
First, you can rely on an editor or IDE, which may offer syntax highlighting, code autocomplete and various analyzers to check the quality of your code; all this staff reduces the number of errors and allows you to explore the framework. Second, when working on a big code base as part of a team, code organization is key, so that you can easily find the code you worked previously as well as new team members can faster learn you code if it’s neatly organized.
Third, as it was previously mentioned, your code should be processed before going into production, e.g. minified, and you can rely on tools locally to do automation for you. Finally, it’s easier and faster to test your application on your local computer or in a special environment; sometimes you code can become so big that you’ll have to run tests all night long.
Introduction to Node.js and VS Code
There are various options of what to use to write your AngularJS code, such as Atom editor, Webstorm or NetBeans IDEs, but my favorite one is Visual Studio Code (VS Code) created by Microsoft. It’s a free multi-platform editor which runs on MacOS, Windows, and Linux. Also, it has a lot of plugins, so you can add the necessary functionality to your editor.
VS Code can be downloaded here and the list of the available plugins is here. In addition, to automate our development process, we have to install Node.js, a JavaScript runtime environment that offers a lot of tools for AngularJS projects. To download Node.js from this link. Installation instructions can be found here.
To check that Node was installed correctly type the command below and make sure that the result does not contain any error messages.
node --version
With the installation of Node.js comes its Node Package Manager or npm which shields you from searching for dependencies on the Internet and makes node modules installation easier. To check that npm is present, type the following commands and make sure that it returns no error messages.
npm --version
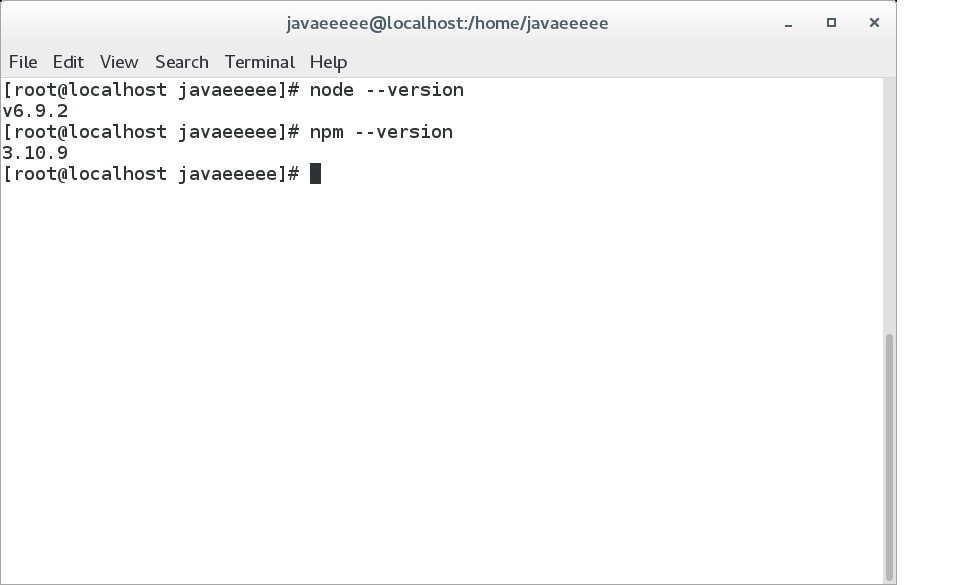
Here is what you should see after installation of Node.js
Now, we’ll create a folder that will contain all our files and add some files here, e.g. MyAngularApp. As a first step, we’ll run the following command from our folder.
npm init -y
It created the package.json file that will contain all the necessary dependencies as well as automation commands. An example of a dependency would be AngularJS, which we’ll serve from our local machine as opposed to our approach of using CDN when we worked with Plunker. An example of a command would be one that starts an HTTP server and opens our application in the browser’s window. An example p ackage.json file is shown below.
  "name": "test",
  "version": "1.0.0",
  "description": "",
  "main": "index.js",
  "scripts": {
    "test": "echo \"Error: no test specified\" && exit 1"
  },
  "keywords": [],
  "author": "",
  "license": "ISC"
}
Package.json file generated by the npm init -y command
A dependency can be installed using npm by typing a command
npm install angular --save
Running this command will result in the creation of node_modules sub-folder inside our folder and downloading AngularJS and its dependencies to this folder. The save command line argument instructs npm to add to the package.json file. This is useful because we have recorded of all of our dependencies in package.json and there is necessity to give out node_modules to the other developers of our project, which can grow big. They can install all the necessary dependencies based on package.json file by issuing the following command.
npm install
Our package.json file with dependencies section added is shown below.
{
  "name": "test",
  "version": "1.0.0",
  "description": "",
  "main": "index.js",
  "scripts": {
    "test": "echo \"Error: no test specified\" && exit 1"
  },
  "keywords": [],
  "author": "",
  "license": "ISC",
  "devDependencies": {
    "angular": "^1.6.1"
  },
  "dependencies": {
    "angular": "^1.6.1"
  }
}
Adding our application files
To speed things up we’ll borrow application files from the previous tutorial
<!DOCTYPE html>

<html lang="en">

<head>
  <title>Hello World AngularJS application</title>
</head>

<body ng-app='app'>
  <h1>Hello World AngularJS application</h1>
  <section ng-controller="HelloController">
    <h4>AngularJS Greeting</h4>
    <label for="name">Type your name here:</label>
    <input id=name type="text" ng-model="myModel">
    <p>Hello {{myModel}}!</p>
  </section>
</body>

<script src="node_modules/angular/angular.min.js"></script>
<script src="app/app.module.js"></script>

</html>
In the HTML file we replaced references to JavaScript files to local ones.
(function () {

  angular.module('app', [])
    .controller('HelloController', HelloController);

  HelloController.$inject = ['$scope'];

  function HelloController($scope) {
    $scope.myModel = 'World';
  }

})();
We place this file, app.module.ts, to the app/ sub-folder of our application’s folder.
Launching AngularJS application
There are several options how to launch our application. The first is to add a plugin to our VS Code editor that can launch our application. Look here for the installation details. After installation one can press
Ctrl+F1 from index.html and it will be opened in a browser window. This method is quick to start, but not all Angular features will work by using it. Also, using local files may not be as convenient for testing as you’ll have to do additional configuration.
The second approach would be to add some lightweight HTTP server locally and use it to serve our files. This problem can be solved in various ways but we’ll go with lite-server. To install it just type the following.
npm install lite-server --save-dev
The save-dev command-line argument tells npm that this dependency is used for development only, not the production, so it is placed to special place in package.jsondevDependencies. The server can be launched by issuing a command
node_modules/.bin/lite-server
And it launches index.html in a browser window, but it is long to type, so it is a good chance to show how to automate our development process using npm and package.json . In package.json you can find the scripts object containing a single property test. We will add comma after that property and a new property start.
{
  "name": "test",
  "version": "1.0.0",
  "description": "",
  "main": "index.js",
  "scripts": {
    "test": "echo \"Error: no test specified\" && exit 1",
    "start": "node_modules/.bin/lite-server"
  },
  "keywords": [],
  "author": "",
  "license": "ISC",
  "devDependencies": {
    "angular": "^1.6.1"
  },
  "dependencies": {
    "angular": "^1.6.1"
  }
}Package.jsonfile with a start script
After that, we can type
npm start
In our command line and that would start our application using an HTTP server.
We can launch the server and our application from VS Code by configuring tasks. To accomplish this one should press F1 and type tasks in the input field and select “ Configure task runner ” from the drop down list. After that you should select “ npm ” in the drop down and copy the following content to the created file.
{
    "version": "0.1.0",
    "command": "npm",
    "isShellCommand": true,
    "showOutput": "always",
    "suppressTaskName": true,
    "tasks": [
        {
            "taskName":"startServer",
            "args": [
                "start"
            ]
        }
    ]
}
VS Codetasks.json file which allows to run npm start command
To run the command it is necessary to press F1, type tasks in the input field and select “Run task”. After that you should select just created “
startServer ” task from the drop down list that appears. Generally, we will not launch our application this way, we’ll need the task created to launch the application in a single button press, which will be discussed in the section about debugging below.
Code completion in VS Code
When we work with JavaScript projects, we should be very attentive and not make typos, because JavaScript is a scripting language and as opposed to compiled languages it cannot catch your typos at the development time but only at the run-time. Moreover, when you launch an application and access the code containing typos, JavaScript will not tell you that you made a typo, but will give you some cryptic error message and you’ll be forced to scrutinize your code for typos on your own.
On the other hand, you can delegate such menial tasks to your computer, and this can be accomplished in several ways. First, one can use test to spot parts of your code containing errors. Tests are good at finding the so-called semantic errors, where you for example placed + instead of – and your program returns an incorrect result. But if we talk about typos, you are again on your own with perusing your code and finding them. We’ll talk about tests later.
Second, one can use the so called static analysis tools which checks your code against a set of rules and allow you to improve the quality of your code. ESLint is a powerful tool that allows you to substantially improve the quality of your code and educate you about the best practices and we’ll discuss it in the next section. Now we’ll go over how you can improve your productivity as a developer and streamline your learning of AngularJS by discovering its features.
The final approach is to add to your development environment features that compiled languages has, namely autocomplete and syntax error highlighting. Both allow you to prevent typos or spot them at the development time, and code complete also allows your to discover the features of the framework. To accomplish this task VS Code relies on TypeScript, a language developed by Microsoft, which can be transpiled to JavaScript. Spoiler alert: we’ll not write any Typescript in this tutorial, all our code we’ll be in JavaScript; we’ll use Typescript in the background for syntax checks and to provide autocomplete feature to our editor.
The autocomplete feature also known as IntelliSense is based on Typescript Declaration Files, a bridge between JavaScript and TypeScript worlds, which are automatically downloaded by VS Code to Microsoft/TypeScript sub-folder of the user’s folder based on dependencies added to the package.json file. By default, files in the node_modules folder are not treated as part of the application source code to speed up the autocomplete feature.
In order to inform VS Code that our project is a JavaScript project we add jsconfig.json file , where we explicitly specify that we ignore node_modules folder and rely on ES5. The example of the file that suits our needs is shown below. The file is placed in the root folder of the project.
{
    "compilerOptions": {
        "target": "ES5"
    },
    "exclude": [
        "node_modules"
    ]
}
The simplest version of jsconfig.json file which informs VS Code that we work with JavaScript project
It should be noted that we can use the advanced ECMAScript features in our project and rely on TypeScript to downcompile our code to the older version of ECMAScript such as ES5 and all the necessary settings are done using the jsconfig.json file.
Adding static analysis tools to AngularJS project
When writing JavaScript, you may omit semicolons at the end of the lines in the majority of cases, but sometimes they are necessary. In order to alleviate your cognitive burden and allow you to concentrate on the algorithm at hand, you can put them even if they are unnecessary. It is one best practice you can use. Another one is always adding curly braces for loops and conditionals even if they are followed by a single-liner and are redundant. This prevents errors if you decide to add more instructions to your loops or conditionals.
Best practices allow you to prevent errors, but the problem is that it can be time-consuming to find all of them on the Internet. To solve this problem, static analysis tools were invented and linters are an example. These tools are used to apply a set of rules to your code and inform you if it does not adhere to them. There are various linters and we’ll use ESLint for our example. Also, there are special sets of rules for various cases, for example, if you develop React application you can rely on AirBnB rules. There are rules for AngularJS applications that you can add to your project as well.
There are a lot of best practices for AngularJS projects and an example set of rules is here. You do not need to memorize them all, ESLint will prompt you when you break some rule, and you can find in the aforementioned document why the particular rule is useful. So, in addition to improving your code, ESLint educates you and makes you a better developer by providing feedback based on the knowledge of professionals.
To add ESLint and rules to the project we’ll do the following. We’ll, first, add ESLint to our project.
npm install eslint eslint-plugin-angular eslint-config-angular --save-dev
The next step is to configure ESLint and do so we’ll create the .eslintrc.js file in the root folder of our project. The example file is shown below.
module.exports = {
    "extends": ["angular", "eslint:recommended"],
};
.eslintrc.js file to configure ESLint to work with AngularJS
After that, we can add a lint task to our package.json file to the place where we added the start command.
"lint": "node_modules/.bin/eslint ./**/*.js; exit 0;"
And in order to enable ESLint warnings in the editor, we need to add VS Code ESLint extension.
To run the command we added from the command line key in the following.
npm run lint
Debugging AngularJS projects in VS Code
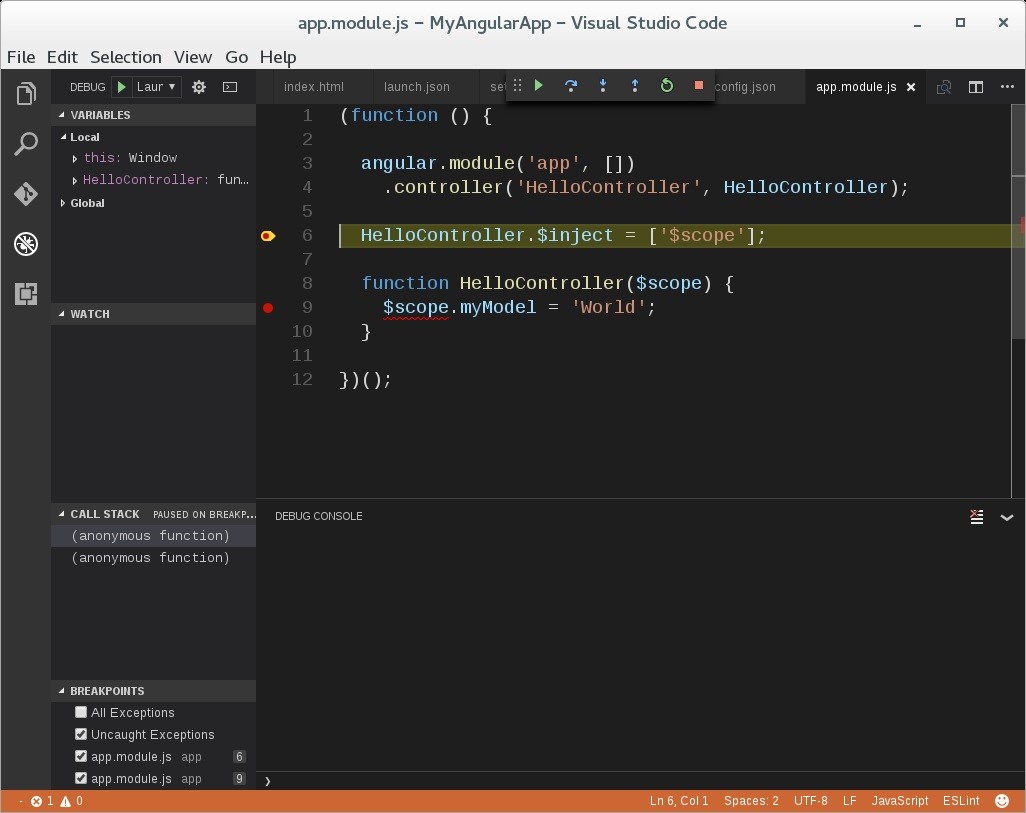
Sometimes our code does not work as intended and we could rely on the debugger to find problems. One approach to debugging is to use developer tools of a browser. Another one is to use VS Code integration with Google Chrome. We need to add Debugger for Chrome extension and configure our editor.
Debugging in VS Code offers breakpoints among other features and if there are no breakpoint in our code, we can use debugger integration simply to launch our application. A Debugging session is started using an F5 key, and if there is no configuration file, VS Code will suggest creating one. When we press F5 in a newly-created project, VS Code offers to select the environment. The one for our project is “chrome” which can be selected from the drop-down list, stipulated that we have installed the aforementioned extension. After that a launch.json file opens in the editor with two configurations: the first one is to launch the application and the second one to attach the debugger to an existing Chrome tab. The file with some additions is shown below.
{
    "version": "0.2.0",
    "configurations": [
        {
            "name": "Launch Chrome against localhost, with sourcemaps",
            "type": "chrome",
            "request": "launch",
            "url": "http://localhost:3000",
            "sourceMaps": true,
            "webRoot": "${workspaceRoot}",
            "preLaunchTask": "startServer"
        },
        {
            "name": "Attach to Chrome, with sourcemaps",
            "type": "chrome",
            "request": "attach",
            "url": "http://localhost:3000",
            "port": 9222,
            "sourceMaps": true,
            "webRoot": "${workspaceRoot}"
        }
    ]
}
launch.json file that starts lite-server and opens AngularJS application in a Chrome tab
The differences between generated and this configuration sre that the port was changed from 8080 to 3000 as this is the default port for lite-server and the preLaunchTask was added that starts the server using previously configured task. Now we can launch our application using F5 button, set breakpoint, add watches, etc. After launching the application, to hit breakpoints press Restart button or press Ctrl-Shift-F5.

Another option is to start Chrome browser in the debug mode. This is accomplished by passing –remote-debugging-port=9222 to Chrome executable. After that, it is necessary to open the application in the browser before attaching the debugger. The URL is specified in the “ attach ” part of the launch.json file.
Summary
It this tutorial you learned how to set up the development environment to create AngularJS applications using Command Line Interface and Visual Studio Code. As your application grows, it becomes more difficult to check that all parts work as intended and it is a good idea to automate the testing because it is hard to remember all the use cases, and time-consuming to check your app after making changes. In the next part of our tutorial, we’ll talk about the end-to-end testing of our application.
Resources
- A curated list of delightful VS Code packages and resources
- How to Use npm as a Task Runner
- JavaScript “Salsa” language service
- Getting started with ESLint
- Linters
- ESLint plugin for AngularJS applications
- Introducing Chrome Debugging for VS Code
| Reference: | AngularJS Tutorial: Developing AngularJS Applications using VS Code from our WCG partner Dmitry Noranovich at the Java and JavaEE blog blog. |


