PHP Form Validation Example
EDITORIAL NOTE: In this post, we feature a comprehensive PHP Form Validation Example.
Data is an integral part of an application. There is a golden rule for developers.
Never trust your user’s information.
So, we need to always filter and validate the user entered before storing it in application’s database. In this article, we will learn how to perform basic validation of form in php.
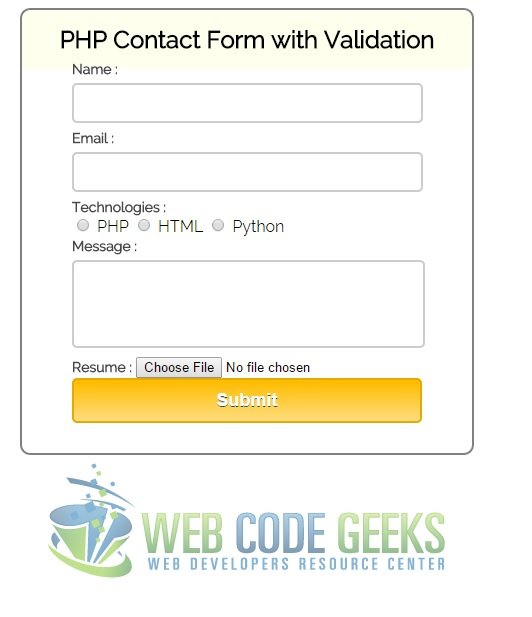
We will create a simple registration form which will contain various inputs like textbox, checkbox, radio buttons and a submit button. After submitting the form, we will validate the fields with php and show error messages if there are some errors.
Contact Form

Text Fields
The name and email are the text input elements of the form and can be coded like this :
<input class="input" type="text" name="name" value="">

<input class="input" type="text" name="email" value="">
The basic text input is created using the input tag by setting the type to text. The initial contents of the input can be specified using the value attribute. If you do not include this attribute, or if you specify an empty value, there will be no contents by default. The text input is a single line input accepting any normal text characters, but not linebreaks. If the contents are too large to fit, the input will scroll, usually without a visible scrollbar.
Radio Buttons
<input type="radio" name="technologies" value="PHP"> PHP

<input type="radio" name="technologies" value="HTML"> HTML

<input type="radio" name="technologies" value="PYTHON"> Python
A radio button is created using the input element, by setting the type attribute to radio. Radio buttons are put into groups by giving them the same name attribute, and you can have multiple radio groups in a form. To pre-select a radio input, set the checked attribute on the desired input (this is another attribute that does not need a value). You should never attempt to pre-select more than one radio input in a group.
Textarea
<textarea name="message" val=""></textarea>
A textarea is a larger version of a text input that can contain multiple lines of text, including linebreaks. Most browsers will display a scrollbar if the contents are too large for the textarea.
Textareas are created using the textarea tag. This requires a closing tag, and has no value attribute. Instead, the default value is written in between the opening and closing tags. It requires that you provide the rows and cols attributes, which give a suggestion for an initial size (based on the number of characters that should be displayed vertically and horizontally). This is a little unusual, since it forces you to specify display related information in the HTML, but you can always override them using the height and width styles in CSS.
File Input
<input class="input" type="file" name="resume">
This allows the user to choose a file that will be uploaded to the server. There are obvious security issues here, so in order to prevent pages uploading files without permission, browsers will not allow HTML or script to set the initial value of the input.
When you make a POST request, you have to encode the data that forms the body of the request in some way.
HTML form provide three methods of encoding.
application/x-www-form-urlencoded(the default)multipart/form-datatext/plain
The specifics of the formats don’t matter to most developers. The important points are :
application/x-www-form-urlencoded is more or less the same as a query string on the end of the URL.
multipart/form-data is significantly more complicated but it allows entire files to be included in the data. An example of the result can be found in the HTML 4 specification.
text/plain is introduced by HTML and is useful only for debugging — from the spec: They are not reliably interpretable by computer — and I’d argue that the others combined with tools (like the Net tab in the developer tools of most browsers) are better for that).
Submit Button
<input class="submit" type="submit" name="submit" value="Submit">
The submit button is the button that causes the information in the form to be submitted to the server. Normally these are not given a name but if they are, then their name and value will also be sent to the server. This can be useful if you want to have multiple submit buttons, and you want the server side script to make decisions based on which button is clicked.
A submit button is created using the input element, by setting the type attribute to submit.
Form element
<form method="post" action="<?php echo htmlspecialchars($_SERVER["PHP_SELF"]);?>" enctype="multipart/form-data" >
htmlspecialchars() is enough to prevent document-creation-time HTML injection with the limitations you state (ie no injection into tag content/unquoted attribute). This prevents our form cross site scripting attacks or XSS attacks. It is always better to be on the safer side.
Forms are defined using the form tag. There are two types of method by which you can submit your form. GET method shows every bit of information of your form in url and has limitation of 4 KB of data. In POST method, the information is hidden from the end user and you can have more than 4 KB of data.
The action attribute defines the name of page where the page should go to submit the form contents. In the above example we the page is submitting the contents of the form to itself.
Form Processing
As we are submitting the form to itself, we need to first detect the form submission. If we detect a form submission, then we validate the form. We detect whether the form is submitted by writing following code :
<?php

if ( isset ( $_POST['submit'] ) ) { // Checking null values in message.

//Validate the form

}

?>
As shown in above code snippet, we first confirm whether the form has been submitted by checking if submit has been set. isset function in php checks if a variable is set and is not null.
Form Validation
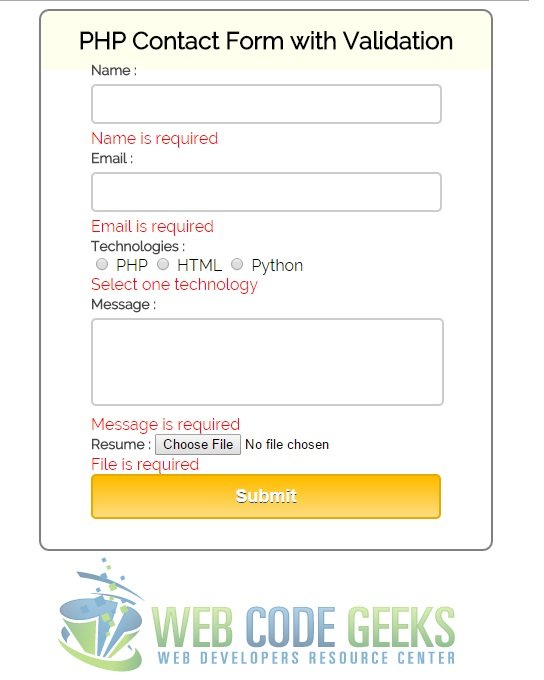
After submitting the form should throw validation errors. It looks like this :

Let’s look at the php required for validating the form :
<?php

$name =""; // Sender Name

$email =""; // Sender's email ID

$message =""; // Sender's Message

$nameError ="";

$emailError ="";

$messageError ="";

$fileError ="";

$successMessage =""; // On submitting form below function will execute.

if ( isset ( $_POST['submit'] ) )  { // Checking null values in message.

if ( empty ( $_POST["name"] ) ) {

$nameError = "Name is required";

}

if ( empty ( $_POST["email"] ) ) {

$emailError = "Email is required";

}
if   (!isset ( $_POST["technologies"] ) ) {

$technologiesError = "Select one technology";

}
if ( empty ( $_POST["message"] ) ) {

$messageError = "Message is required";

}

if ( !$_FILES['resume']['name'] ) {
 $fileError = "File is required";
 }

}

?>
The validation starts with following steps :
- A variable for each text fields
- Error message variable for each fields
- A variable for success message
empty() function usage is to determine whether a variable is considered to be empty. A variable is considered empty if it does not exist or if its value equals FALSE.
empty() function is used to determine whether the values are empty or not.
$_FILES is an associative array of items uploaded to the current script via the HTTP POST method.
Also, we need to display the error messages in the form. The html code we write for displaying the error messages is :
<form method="post" action="<?php echo htmlspecialchars($_SERVER["PHP_SELF"]);?>" enctype="multipart/form-data">

<label>Name :</label>
<input class="input" type="text" name="name" value="">
<div class="error"><?php echo $nameError;?></div>

<label>Email :</label>
<input class="input" type="text" name="email" value="">
<div class="error"><?php echo $emailError;?></div>

<label>Technologies :</label>
<div>
<input type="radio" name="technologies" value="PHP"> PHP
<input type="radio" name="technologies" value="HTML"> HTML
<input type="radio" name="technologies" value="PYTHON"> Python
</div>
<div class="error"><?php echo $technologiesError;?></div>

<label>Message :</label>
<textarea name="message" val=""></textarea>
<div class="error"><?php echo $messageError;?></div>

<label>Resume :</label>
<input class="input" type="file" name="resume">
<div class="error"><?php echo $fileError;?></div>

<input class="submit" type="submit" name="submit" value="Submit">
<div class="success"><?php echo $successMessage;?></div>
</form>
For enhanced security measures, we can have htmlspecialchars() processing before outputting the input to form.
Extending Form’s validation rules
For now, we are just checking whether the input is empty or not. But, we need to validate whether the email entered by user is valid or not. We alter our validation code for email as follows :
if ( ! filter_var ( $_POST["email"] , FILTER_VALIDATE_EMAIL ) )
{
$emailError = "Email is not valid";
}
filter_var will do, both, sanitize and validate data. What’s the difference between the two?
- Sanitizing will remove any illegal character from the data.
- Validating will determine if the data is in proper form.
Note: why sanitize and not just validate? It’s possible the user accidentally typed in a wrong character or maybe it was from a bad copy and paste. By sanitizing the data, you take the responsibility of hunting for the mistake off of the user.
So, now we can now sanitize and validate user’s email address.
Extending Form’s usability
We now validated the form, but our input data is nor being repopulated and this will irritate user a lot. We need to now add functionality to repopulate the form data.
In our php validation snippet :
if ( isset ( $_POST['submit'] ) ) { // Checking null values in message.

$name = $_POST["name"]; // Sender Name
$email = $_POST["email"]; // Sender's email ID
$message = $_POST["message"]; // Sender's Message
While some changes in our html form :
<input class="input" type="text" name="name" value="<?php echo $name; ?>">

<input class="input" type="text" name="email" value="<?php echo $email; ?>">

<textarea name="message" val=""><?php echo $message; ?></textarea>
So, now our form’s data is being repopulated and user irritates a lot lesser. But, still we haven’t being able to repopulate our selection for radio button. With a bit more effort and functionality we can achieve it as follows :
In our form processing in PHP we store value for technologies as well.
if(isset($_POST['submit'])) { // Checking null values in message.

$name = $_POST["name"]; // Sender Name

$email = $_POST["email"]; // Sender's email ID

$message = $_POST["message"]; // Sender's Message

$technologies = $_POST["technologies"]; //selected value of technologies

}
We have to also modify our HTML for radio buttons to select them again. So, we do :
- Check if
$technologiesis previously set - If it is set and the
valueis matching currentradiobutton value then weechochecked
<input type="radio" name="technologies" value="PHP" <?php if (isset($technologies) && $technologies == "PHP") echo "checked"; ?> > PHP

<input type="radio" name="technologies" value="HTML" <?php if (isset($technologies) && $technologies == "HTML") echo "checked"; ?> > HTML

<input type="radio" name="technologies" value="PYTHON" <?php if (isset($technologies) && $technologies == "PYTHON") echo "checked"; ?> > Python
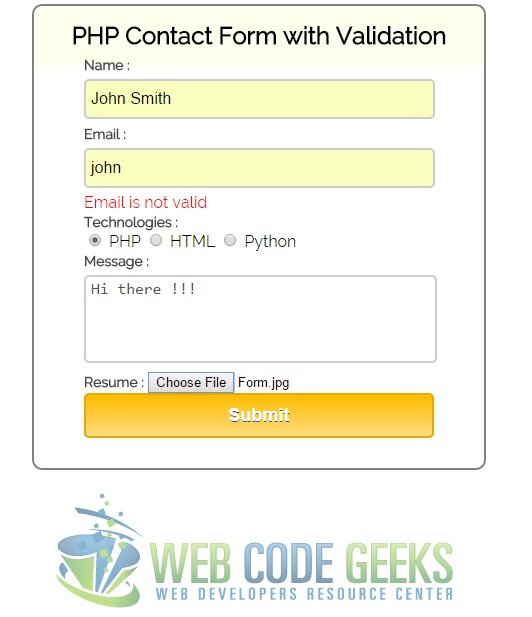
So, if we check now, our radio buttons are re-selected even if there are errors :

Displaying success message
We have handled form validation and error messages. But, now we need to also handle the situation when everything is fine and user has entered all the information. We modify our code as follows :
$errors = 0;

if(isset($_POST['submit'])) { // Checking null values in message.

 if (empty($_POST["name"])){
 $nameError = "Name is required";
 $errors = 1;
 }

 if(!filter_var($_POST["email"], FILTER_VALIDATE_EMAIL))
 {
 $emailError = "Email is not valid";
 $errors = 1;
 }

 if (!isset($_POST["technologies"])){
 $technologiesError = "Select one technology";
 $errors = 1;
 }

 if (empty($_POST["message"])){
 $messageError = "Message is required";
 $errors = 1;
 }

 if(!$_FILES['resume']['name']) {
 $fileError = "File is required";
 $errors = 1;
 }
if($errors == 0)
{
$successMessage ="Form Submitted successfully..."; // IF no errors set successMessage
}
}
The above code does following things :
- It checks whether any error is there by checking the value of
$errors - If there is no error it sets the
$successMessage
We display this $successMessage variable in our HTML as follows :
<input class="submit" type="submit" name="submit" value="Submit">

<div style="background-color:green"><?php echo $successMessage;?></div>
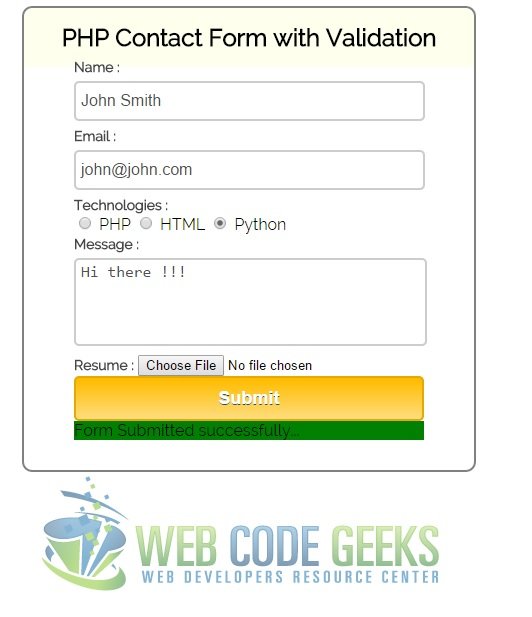
The output for above code is :

So, we have successfully validated and submitted the form.
Summary
This is a basic form handling approach that should be followed while writing procedural php code. But, this is not the recommended approach for large scale web apps. We have many mature frameworks available to handle all these functionalities and abstract them. If you want ot go and develop a app, go for some mature framework. Procedural way of coding is not the recommended way to do any more…
Download the source code
This was an example of how to perform form validation with PHP.
You can download the full source code of this example here: Form Validation Files


Hi !!!
Thank you by your work but your code have errors !
You must go check it and there are part what it can be improve !
Greeting !!